How AI Restores Old, Scratched, and Faded Photos (And What It Still Gets Wrong)
tips tricksai technologyimage upscaling⚡ 18 min read
RB
RemoveBgNow Vision Editorial
18 min read3,401 words
Somewhere in most homes, there's a box or a drawer with old photographs nobody has looked at in years. A wedding picture with a crease running through the bride's face. A childhood photo so faded it looks like it's disappearing into fog. A grandfather in a uniform, his features half eaten away by a water stain. Maybe there's a photo of a great-grandmother nobody in the family ever actually met, and the only thing left of her is this one damaged print sitting at the bottom of a shoebox.
For decades, fixing those photos meant either living with the damage or paying a professional restorer who would spend hours — sometimes days — retouching them pixel by pixel in Photoshop. That process could easily cost anywhere from fifty to several hundred dollars per photo, depending on the damage, which is part of why so many old family photos just stayed damaged. They weren't worth "fixing" in a purely financial sense, even though they were priceless in every other sense.
That's changed. Today, you can upload the same damaged photo to an AI tool and get a repaired version back in under a minute, often for free.
But "AI fixes it" is doing a lot of hiding in that sentence. What is actually happening when a scratch disappears or a faded face suddenly looks sharp again? Is it really restoring the photo, or is it partly guessing? And if it's guessing, how much should you trust it with a photo that matters this much? Let's go through it properly, without the marketing language.
Why Old Photos Fall Apart in the First Place
Before we get to AI, it helps to understand what's actually wrong with these photos, because the type of damage determines how hard the AI actually has to work.
Printed photographs are physical objects, and physical objects age. The dyes used in color prints break down with prolonged light and heat exposure, which is why old color photos often shift toward orange, yellow, or magenta rather than fading evenly across all colors. Black-and-white prints suffer differently — silver particles in the photographic emulsion oxidize over time, causing that faint metallic, mirror-like sheen you sometimes see on very old prints, a phenomenon collectors call "silvering."
On top of the chemical decay, there's physical damage: scratches from being handled or rubbed against other photos, creases from being folded into a wallet or an envelope, mold and foxing spots from being stored somewhere humid, torn corners, and water stains that leave blotchy, uneven discoloration. Dust and grime that settled into a scanner glass or a photo album sleeve can also show up as tiny spots across the whole image.
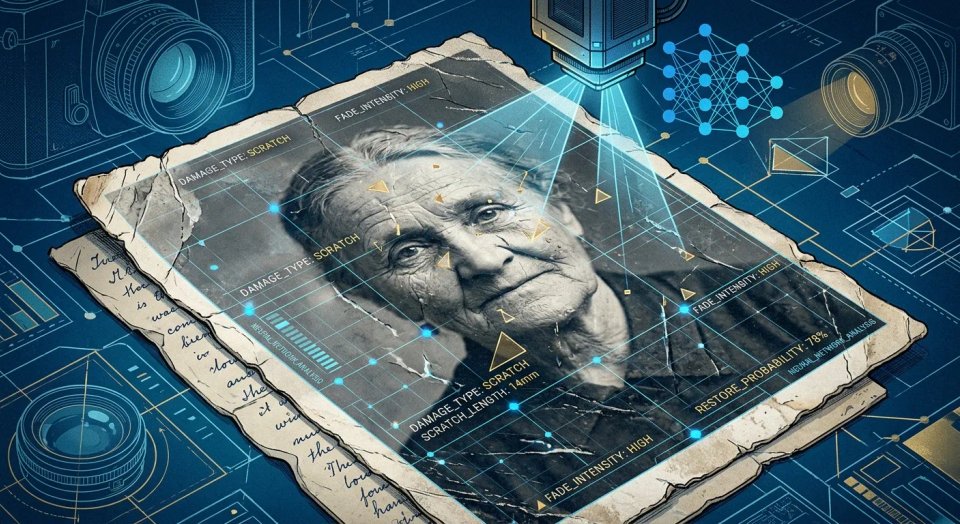
Here's the part that matters most for understanding AI restoration: a single old photo usually has several of these problems layered on top of each other at once. It's not just "faded" or just "scratched" — it's faded and scratched and slightly blurred and grainy, all in the same eight-by-ten inch print. The AI isn't solving one problem. It's untangling several overlapping problems simultaneously, and it has to figure out which pixel-level clue belongs to which type of damage before it can even start fixing anything.
💖
Enjoyed this article? Share it with others
Help fellow designers, sellers, and creators discover this guide.
Written and peer-reviewed by the RemoveBgNow team. We test and evaluate neural matting networks, e-commerce white background compliance, and high-resolution photo optimization.
It's easy to imagine AI as something that "knows" what the original photo looked like and simply reveals it, like developing an old film negative. That's not what's happening, and it's an important distinction to hold onto.
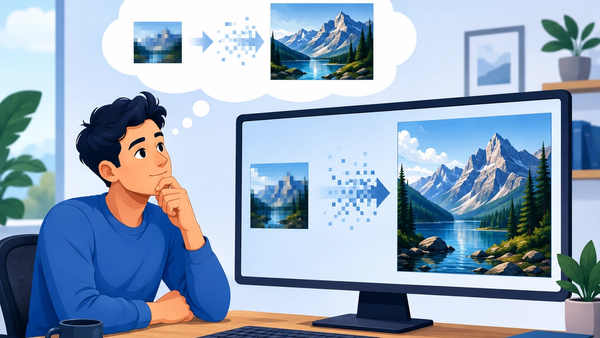
AI restoration tools don't have access to the real, undamaged photo. Instead, they've been trained on enormous numbers of image pairs — a damaged or artificially degraded version, and a clean version of the same or similar image. Through that training, the model learns general patterns of what a "clean" photo tends to look like: how skin should look under different lighting, how a scratch differs from an eyebrow or a strand of hair, how faded gray tones typically correspond to certain real-world colors, how the edge of a jawline usually continues under a blur.
When you feed it your photo, it isn't recovering hidden data that was somehow still there. It's making an extremely well-informed prediction based on everything it has learned from millions of other photos it was trained on. That distinction matters, and we'll come back to it later, because it explains both why these tools can feel almost magical and why they sometimes get things subtly, quietly wrong.
The Technology Behind the Curtain
A handful of specific research breakthroughs are responsible for most of what you see in restoration apps today. It's worth knowing their names, because you'll often find them mentioned quietly in the settings menu of the app you're using.
GFPGAN, released by researchers at Tencent in 2021 in a paper titled "Towards Real-World Blind Face Restoration with Generative Facial Prior," is one of the most widely used models for repairing faces specifically. It works by combining a damaged face with a "generative facial prior" — essentially, knowledge baked into a pretrained face-generation model called StyleGAN2 — so it can rebuild realistic eyes, skin texture, and facial structure even from a badly blurred or low-resolution starting point. It's fast, it's open-source, and it's built into many restoration apps you've probably already used, sometimes without realizing it, since it also gets used inside popular tools like Stable Diffusion interfaces for general face touch-ups.
CodeFormer came a little later and takes a different approach. Instead of blending in a generative prior directly, it uses something closer to a lookup system: a "codebook" of facial patterns learned from thousands of examples, paired with a transformer model that predicts which patterns best match the damaged input. It tends to handle more severe degradation than GFPGAN and gives users a fidelity control slider, letting you choose whether the model should stay closer to the original pixels or lean more heavily on its learned patterns.
Then there's Microsoft's "Bringing Old Photos Back to Life," a research project first presented at CVPR 2020 that specifically targeted old, physically damaged photographs rather than just blurry modern ones. The researchers behind it pointed out something important: old photo damage is a "mixed" problem, combining unstructured issues like grain and fading with structured issues like scratches and tears. Their model was trained using a clever workaround for a real problem — there aren't real pairs of "damaged old photo" and "the same photo but new," because nobody has a time machine. So they trained the model on synthetically damaged modern photos, then used a shared latent space to help it generalize what it learned to real, genuinely old photographs. It remains one of the most cited approaches for this exact use case: authentically old, physically damaged prints, not just soft or blurry digital photos.
More recently, diffusion models — the same family of technology behind AI image generators — have started showing up in restoration tools too. Rather than predicting a fix in one step, diffusion-based restoration works by starting from random noise and gradually "denoising" toward a clean image, guided by the damaged photo at every step. This tends to produce more natural, less artificial-looking textures than older GAN-based methods, though it can also be slower to run.
Research presented at NTIRE 2025, a major computer vision restoration competition, showed that the strongest current systems don't rely on just one model. They combine several: one network handling structural damage like scratches, another handling color and tone correction (since old photos often develop a faded, whitish haze that needs its own dedicated fix), and a face-specific model that only activates when the face quality is measured to be poor enough to actually need it. That last detail matters — the best systems are careful not to touch faces that don't need touching, because unnecessary AI intervention on a face is exactly where things can go wrong.
Alongside these specialized restoration models, general-purpose multimodal AI tools have also entered the space. Prompt-based image editors, where you simply describe what you want ("restore this old photo, remove scratches and fading, keep the face accurate"), now let people combine restoration, colorization, and upscaling in a single instruction rather than running three separate tools. It's less precise than a dedicated restoration model, but it's dramatically easier for someone who just wants a decent result without learning any of the terminology above.
What Actually Happens When You Upload a Photo
Strip away the branding of any particular app, and the process behind most restoration tools looks roughly like this:
Detection – The AI scans the image to identify what kind of damage is present: scratches, dust spots, creases, fading, noise, or blur. Some tools use a quality-scoring model here to decide how aggressively to intervene.
Structural repair – Physical damage like scratches and tears gets filled in based on the surrounding pixels and learned patterns, similar to the "inpainting" technique used to remove unwanted objects from photos.
Face-specific restoration – If a face is detected, a dedicated model (like GFPGAN or CodeFormer) sharpens facial features separately, since faces need far more precision and care than backgrounds, clothing, or scenery.
Color and contrast correction – Faded tones get rebalanced, contrast is restored, and in black-and-white photos, color can be added based on learned associations between shapes, textures, and typical real-world colors — skin tones, sky, grass, and fabric all get treated differently.
Artifact cleanup – A final pass often checks for anything the AI itself introduced by mistake, since generative models can occasionally leave behind strange textures or slightly warped details of their own, especially around hair and hands.
Upscaling – The final image is often enlarged using super-resolution models (Real-ESRGAN is a common one) so it looks sharp even at a larger print size, rather than just being a bigger, blurrier version of the original.
Most of this happens in seconds because the model isn't "thinking" the way a human retoucher does — it's running the image through a network that has already learned these patterns during training, a process that can take the original researchers weeks of computing time. Your upload just applies what the model already knows; it doesn't learn anything new from your specific photo.
The Tools People Actually Use
You don't need to run any of this yourself, and most people won't. A number of tools have made it accessible depending on what you're trying to do:
Adobe Firefly now has restoration built into its generative tools, integrated with Photoshop for people who want to fine-tune the result afterward layer by layer.
MyHeritage's Photo Enhancer is popular specifically for family history and genealogy work, since it's built around old portraits and pairs well with their broader family-tree tools.
ON1 Photo RAW's Restore AI, launched in 2026, is aimed at people digitizing entire family archives — old prints, negatives, and slides — in bulk rather than one photo at a time.
Remini and similar mobile apps are built for speed and simplicity, useful for a quick fix on a single photo from your phone.
Browser-based tools like Pixelbin work without any software installation, handling common formats like JPG, PNG, and WEBP directly in the browser.
GFPGAN and CodeFormer, if you're comfortable with a bit of setup, are free and open-source, and are the same models many commercial apps quietly run behind the scenes anyway.
If you're restoring one meaningful photo, almost any of the free web tools will do. If you're digitizing a whole family archive — dozens or hundreds of prints — it's worth looking at a tool built for batch processing, since running each photo through manually gets tedious fast.
AI Restoration vs. a Human Professional
It's worth being honest about where AI still doesn't fully replace a skilled human restorer.
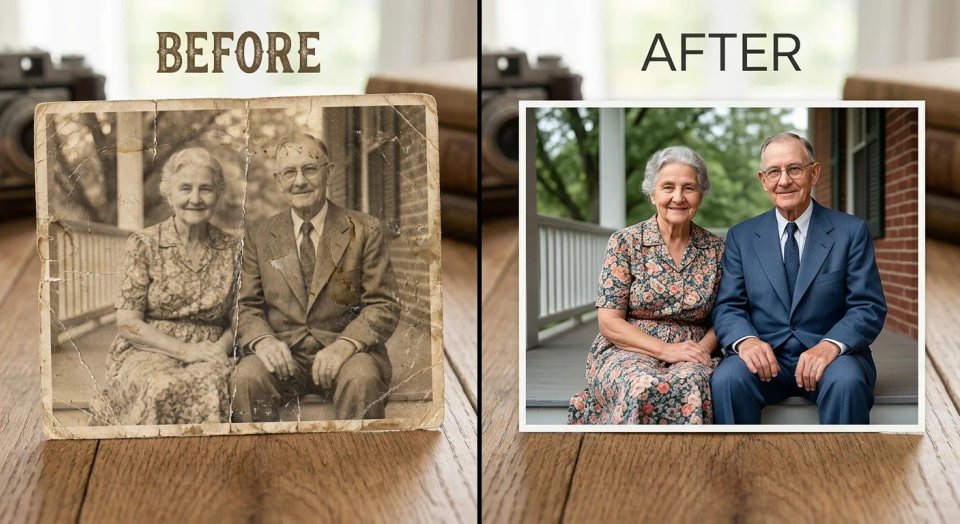
AI is faster and dramatically cheaper — often free, versus what could be a significant cost for professional, hands-on retouching. It's also more than good enough for casual damage: light fading, small scratches, minor blur, dust spots. For those cases, there's genuinely no reason to pay someone when a free tool gets you 90% of the way there in under a minute.
Where a human restorer still earns their fee is on severely damaged photos where accuracy matters more than speed — a face half destroyed by water damage, a torn photo missing a large section, or any photo where the client needs the result to be verifiably accurate rather than just plausible-looking. A skilled human restorer can cross-reference other photos of the same person, ask family members what a missing detail actually looked like, and make judgment calls an algorithm can't. For a single irreplaceable photo of real historical or emotional weight, that extra layer of human judgment can be worth paying for.
A reasonable middle ground a lot of people land on: use AI for the first pass on everything, and only send the handful of photos that came out looking "off" to a human professional for a closer look.
The Part Most Tools Don't Advertise
Here's the honest catch, and it's worth taking seriously if the photo matters to you emotionally.
Because AI is predicting rather than recovering, it can occasionally guess wrong — especially on faces, and especially when the damage is severe. Professional restorers who've tested these tools extensively have pointed out a recurring issue: on badly degraded photos, AI models sometimes rebuild a face that looks technically sharp and realistic, but doesn't quite match the actual person anymore. Eyes become a little too symmetrical. Skin texture gets smoothed into something generic. The result looks convincing to a stranger, but feels subtly wrong to someone who actually knew the person.
This happens because the model is filling gaps using patterns learned from other faces in its training data, not from anything specific to your relative. The more damage there is to work with, the more the AI has to invent, and the more room there is for that invention to drift from reality. There's also a broader conversation happening among researchers and historians about what gets lost when this kind of "smoothing" happens at scale — fine lines, distinctive features, and the small imperfections that made a face recognizably someone's own can get quietly averaged away in favor of a more generically "attractive" or symmetrical result. That's not a reason to panic about using these tools, but it is a reason to look closely at the result before you trust it completely, rather than assuming sharper automatically means more accurate.
This isn't a reason to avoid AI restoration — it's a reason to use it thoughtfully, especially for photos where accuracy matters more than polish.
Getting Better, More Honest Results
A few things genuinely make a difference in how well this works for you:
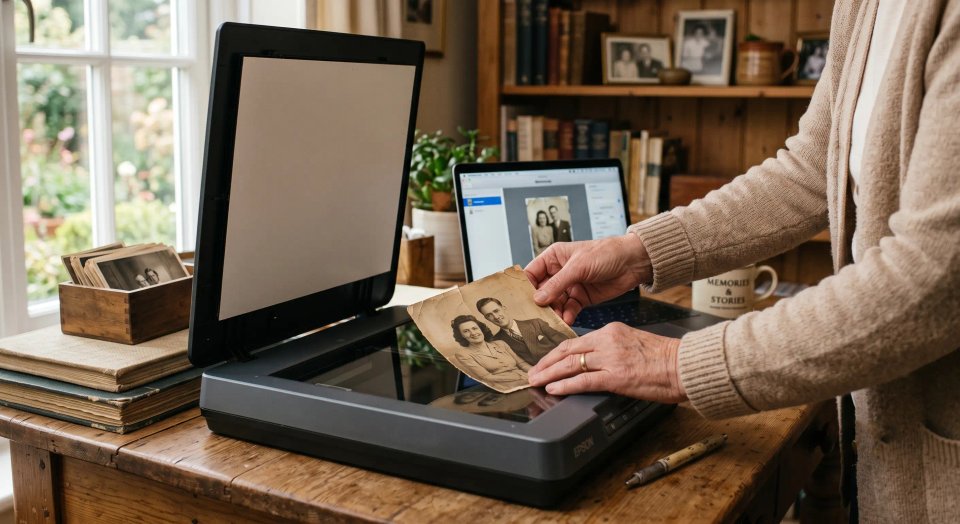
Start with the best scan you can. If you're digitizing a physical print, a flatbed scanner at 600 DPI captures far more detail than a phone photo, and cleaning the scanner glass first prevents new dust artifacts from being baked into your scan. If you only have a phone, apps designed for document or photo capture (like Google PhotoScan) reduce glare better than a standard camera app.
Keep your original file. Never restore over the only copy you have, digital or physical. AI edits should always be saved as a new file, and the original scan should be archived somewhere safe.
Use the least aggressive setting that solves the problem. Many tools offer a fidelity slider — a setting closer to "preserve original" keeps the AI from taking creative liberties with a face it isn't confident about.
Fix structural damage before colorizing. Removing scratches and tears first, then colorizing afterward, generally gives cleaner results than doing everything in one aggressive pass, since color models can otherwise "paint over" damage in strange ways.
Crop tightly around faces for face-specific tools. Some face restoration models perform worse when a face is small within a larger scene; cropping closer to just the face and shoulders before running face-specific repair, then recombining, often gives a cleaner result.
For irreplaceable photos, get a second opinion. If a photo is severely damaged and precious, comparing the AI result against other photos of the same person, or having a human restorer review it, is worth the extra step before you print or frame it.
Correct the orientation and crop out irrelevant background first. Rotating a sideways scan and removing picture frames or desk backgrounds before restoration helps the AI focus its attention on the actual photo content rather than wasting effort on parts you don't care about.
What About Really Old or Unusual Formats?
Not every old photo is a standard print. Tintypes, daguerreotypes, and early Polaroids each have their own quirks — tintypes often have a metallic sheen that can confuse automatic color correction, and Polaroids fade in a distinctive yellowish way that's different from standard color prints. Most consumer AI tools are trained primarily on standard photographic prints and negatives, so results on these older or unusual formats can be more unpredictable. If you have something in one of these formats and it holds real historical or sentimental value, it's worth testing a couple of different tools and comparing results rather than trusting the very first output you get.
Where This Leaves Us
AI photo restoration is genuinely one of the more quietly moving uses of this technology. It's given people back moments they thought were gone for good — a grandmother's real smile, a father's face before the war, a childhood nobody photographed twice. That's not a small thing, and it's part of why this particular corner of AI tends to generate such an emotional reaction from people who try it, even those who are otherwise skeptical of AI in general.
But it works best when you understand what it's actually doing: making an educated, pattern-based guess, not performing magic, and not recovering some hidden "true" version of the photo that was there all along. Used with that understanding — a good scan, a light touch, a willingness to double-check the result, and knowing when a photo is important enough to warrant a human's eyes as well — it's one of the more genuinely useful applications of AI available to ordinary people today.
Frequently Asked Questions
Q. Is AI photo restoration actually free? Many basic tools (including open-source models like GFPGAN and CodeFormer, and several web apps) offer free restoration for standard scratches, fading, and blur. Advanced features — like batch processing, higher resolution output, or manual touch-ups — are often paid.
Q. Can AI restore a photo that's badly torn or missing pieces? Yes, to an extent. AI can fill in missing sections using inpainting techniques, but the more of the photo that's missing, the more the AI has to invent rather than reconstruct. Small tears and creases are handled far more reliably than large missing sections.
Q. Will AI restoration change how a person actually looks? It can, especially on severely damaged faces. This is the most important limitation to know about. Using a lower-intensity or "fidelity-preserving" setting reduces this risk, but it's rarely eliminated entirely on very degraded photos.
Q. Do I need any technical skill to use these tools? No. Most consumer apps are upload-and-click. The open-source models (GFPGAN, CodeFormer) do require some technical setup if you want to run them yourself instead of using an app.
Q. What's the difference between restoration and colorization? Restoration repairs physical and visual damage — scratches, fading, blur, noise. Colorization adds color to black-and-white photos. Many tools now do both in one pass, but doing restoration first tends to produce more natural colorization results afterward.
Q. How long does AI restoration actually take? For most tools, a single photo takes anywhere from a few seconds to about five minutes, depending on the resolution, the amount of damage, and whether you're also adding colorization or heavy upscaling on top of basic repair.
Q. Can AI restore old family videos, not just photos? Some tools are starting to apply similar techniques frame-by-frame to old home videos, but it's far more computationally demanding and less mature than photo restoration. For now, photo restoration is significantly more reliable than video restoration.
Q. Should I still keep my physical old photos after scanning and restoring them? Yes. A digital restoration is a copy, not a replacement. Physical photos, even damaged ones, are historical originals — store them somewhere cool, dry, and dark once you've scanned them.